The original — everyone's first paper plane
EASYEasy to fold, flies beautifully
EASYSimple and fun to throw
EASYSpins down slowly — mesmerising
EASYFlies in circles — not a plane at all
EASYFor restaurants — fold it from a napkin
EASYSimple origami-style plane
Sleek dart — cuts through the air
MEDIUMGlides slowly and gracefully
MEDIUMDistinctive look, great flyer
MEDIUMAerodynamic and elegant
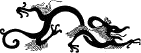
MEDIUMLooks fierce, flies far
MEDIUMCanadian design — a real beauty
MEDIUMUnique shape, surprising flight
MEDIUMWeighted nose — flies far and fast
MEDIUMSlow flyer — floats like a blimp
MEDIUMMore complex origami folds
MEDIUMAdvanced origami — worth the effort
Complex folds, stunning result
HARDVery advanced — for serious folders
HARDCompetition design — precision required
HARDExpert only — the ultimate challenge